
What is the overall process for coding a new battery to a BMW over WiFi?
In a typical BMW battery coding scenario, a diagnostic tool communicates with the vehicle’s Electronic Control Units (ECUs) via the On‑Board Diagnostics (OBD) interface. The tool must transmit a series of messages that inform the ECU of the new battery’s parameters, such as voltage, capacity, and serial number. Traditionally, this communication is performed over a physical USB connection to a dedicated OBD‑II adapter. The method described here replaces the physical adapter with a virtual USB over WiFi solution, leveraging a Raspberry Pi as a bridge between the vehicle and a Windows 10 host running ISTA. The Pi hosts a K+DCAN interface that emulates a CAN bus, while VirtualHere forwards the USB traffic from the Pi to the host. The host then runs ISTA, which performs the battery coding sequence. This architecture eliminates the need for a costly USB‑to‑CAN adapter and provides a flexible, software‑centric workflow.
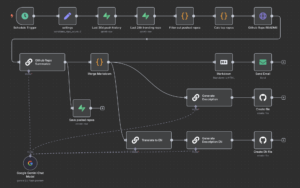
Technical Architecture Diagram Placeholder
What hardware components are required for a WiFi‑based BMW battery coding setup?
The minimal hardware list is as follows:
- Raspberry Pi 4 Model B (4 GB RAM recommended) – serves as the WiFi bridge and CAN interface host.
- K+DCAN USB‑to‑CAN adapter – connects to the Pi’s USB port and provides a virtual CAN bus.
- OBD‑II to K+DCAN cable – links the vehicle’s OBD port to the K+DCAN adapter.
- Standard WiFi router – provides network connectivity for the Pi and the Windows host.
- Power supply for the Pi (5 V/3 A) – ensures stable operation during coding.
No additional USB hardware is required on the Windows host; VirtualHere supplies the virtual USB device over the network.
How does VirtualHere enable USB over WiFi for a Raspberry Pi?
VirtualHere is a software layer that captures USB traffic on a remote device and forwards it to a host machine over TCP/IP. The Pi runs the VirtualHere server, while the Windows host runs the VirtualHere client. The server exposes the K+DCAN adapter as a virtual USB device to the client. The client then mounts the device as if it were physically connected, allowing ISTA to detect and use it without any physical cable.
Key configuration steps include:
- Download and install the VirtualHere server on the Pi.
- Configure the server to listen on a static IP address or DHCP reservation.
- Install the VirtualHere client on the Windows host and point it to the Pi’s IP.
- Verify that the K+DCAN adapter appears in Device Manager under “Universal Serial Bus controllers.”
What are the detailed steps to configure the Raspberry Pi for OBD communication?
1. Prepare the Pi OS
# Update the system
sudo apt update && sudo apt upgrade -y

# Install required packages
sudo apt install -y python3-pip python3-venv git
2. Install the K+DCAN driver
# Clone the driver repository
git clone https://github.com/kplus/kplus-dcan.git
cd kplus-dcan

# Build and install
make
sudo make install
3. Configure the CAN interface
# Create a udev rule to set permissions
echo 'SUBSYSTEM=="usb", ATTR{idVendor}=="0x1a86", ATTR{idProduct}=="0x7523", MODE="0666"' | sudo tee /etc/udev/rules.d/99-kplus.rules

# Reload udev rules
sudo udevadm control --reload-rules
sudo udevadm trigger

# Bring up the CAN interface
sudo ip link set can0 up type can bitrate 500000
4. Install VirtualHere server
# Download the latest server package
wget https://www.virtualhere.com/sites/default/files/usbserver/usbserver_linux_armv7.zip

# Unzip and install
unzip usbserver_linux_armv7.zip
sudo ./usbserver
5. Verify connectivity
On the Pi, run ifconfig to confirm that can0 is active and that the Pi has a static IP on the local network. On the Windows host, launch the VirtualHere client and confirm that the K+DCAN adapter appears as a virtual USB device.
How do I install and configure ISTA on a Windows 10 host?
ISTA (Integrated Service Technical Application) is the official BMW diagnostic software. The installation procedure is straightforward but requires a valid license and a compatible Windows version.
- Download the ISTA installer from the BMW Technical Service portal.
- Run the installer and follow the wizard, selecting the “Standard” installation path.
- During installation, ensure that the “USB driver” component is selected; this installs the necessary drivers for the K+DCAN adapter.
- After installation, launch ISTA and navigate to Tools > Options > Communication. Set the communication port to the virtual USB device exposed by VirtualHere (e.g.,
COM3). - Verify that ISTA detects the vehicle by selecting Vehicle > Scan. The software should enumerate the ECUs and display the vehicle’s VIN.
Once the vehicle is detected, the battery coding procedure can be initiated via Vehicle > Battery > Code. ISTA will prompt for the new battery’s serial number and other parameters.
What are the risks and limitations of using this WiFi‑based coding method?
While the WiFi approach offers flexibility, it introduces several potential failure modes:
- Network latency and packet loss – CAN messages are time‑sensitive; excessive latency can cause timeouts or corrupted data.
- Security vulnerabilities – Exposing the K+DCAN adapter over the network may allow unauthorized access if the network is not properly secured.
- Driver incompatibilities – The K+DCAN driver on the Pi must match the firmware version expected by ISTA; mismatches can lead to communication errors.
- Power supply instability – The Pi’s 5 V supply must remain stable; voltage dips can reset the CAN interface.
- Limited bandwidth – WiFi throughput may be insufficient for high‑volume diagnostic sessions, especially on congested networks.
Mitigation strategies include:
- Use a dedicated, isolated WiFi network with WPA2 encryption.
- Configure the Pi with a static IP and reserve the address on the router.
- Monitor CAN traffic using a tool such as
candumpto detect anomalies. - Ensure the Pi’s power supply is rated for at least 3 A and use a regulated adapter.
- Perform a preliminary test scan before initiating the battery coding sequence.
How can I mitigate potential communication errors during the coding process?
Communication errors manifest as timeouts, checksum failures, or ECU resets. The following checklist reduces their occurrence:
- Confirm that the OBD cable is fully seated and that the vehicle’s OBD port is free of debris.
- Verify that the CAN bitrate on the Pi matches the vehicle’s specification (commonly 500 kbit/s for BMW).
- Use
candump -l -t 0 -n 1000 can0to log CAN traffic and inspect for duplicate or missing frames. - In ISTA, enable “Verbose logging” to capture detailed diagnostic messages.
- If a timeout occurs, increase the communication timeout setting in ISTA’s options.
- Check the VirtualHere client logs for any dropped packets or reconnection events.
By systematically validating each layer—physical connection, CAN interface, network bridge, and software configuration—most errors can be isolated and resolved.
What troubleshooting steps should I follow if the battery coding fails?
1. Check vehicle readiness
# In ISTA, run a full vehicle scan
Vehicle > Scan

# Verify that all ECUs are online
2. Inspect CAN traffic
# Capture traffic during coding
candump -l -t 0 -n 2000 can0 > can_log.txt

# Look for error frames (0x7E8, 0x7E9) or missing responses
3. Validate VirtualHere connection
# On Windows, open VirtualHere client
# Ensure the K+DCAN adapter is listed and connected

# On Pi, check server status
ps aux | grep usbserver
4. Review ISTA logs
Navigate to Tools > Log Viewer and filter for “Battery coding” events. Look for error codes such as 0xC0 (communication failure) or 0xC1 (ECU reset).
5. Re‑initialize the CAN interface
# Reset CAN interface on Pi
sudo ip link set can0 down
sudo ip link set can0 up type can bitrate 500000
6. Reboot the system
As a last resort, reboot both the Pi and the Windows host to clear any lingering driver or network state.
Protocol/Artifact Reference
• BMW Technical Service Portal – ISTA download and documentation.
* K+DCAN USB‑to‑CAN Adapter – Manufacturer’s driver and firmware release notes.
* VirtualHere – Server and client installation guides.
* CANopen Specification – For understanding CAN frame structure.
* Raspberry Pi OS Documentation – For network and udev configuration.
* BMW Battery Coding Procedure – Official service manual section 4.3.
* CAN Traffic Analysis – Using candump and can-utils on Linux.
* Windows Device Manager – For verifying virtual USB device presence.
* ISTA Log Viewer – For detailed diagnostic event capture.
* Network Security Best Practices – For securing WiFi bridges.