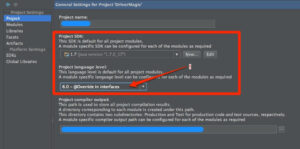
Using and Configuring the Android Studio AVD Emulator
The Android Virtual Device (AVD) emulator environment bundled with Android Studio 1.x was an uncharacteristically weak point in an otherwise reputable application development environment. Regarded by many developers as slow, inflexible and unreliable, the emulator was long overdue for an overhaul. Fortunately, Android Studio 2 introduced an enhanced emulator environment providing significant improvements in terms of configuration flexibility and overall performance and further enhancements have been made in subsequent releases. Before the next chapter explores testing on physical Android devices, this chapter will take some time to provide an overview of the Android Studio AVD emulator and highlight many of the configuration features that are
available to customize the environment.
1 The Emulator Environment
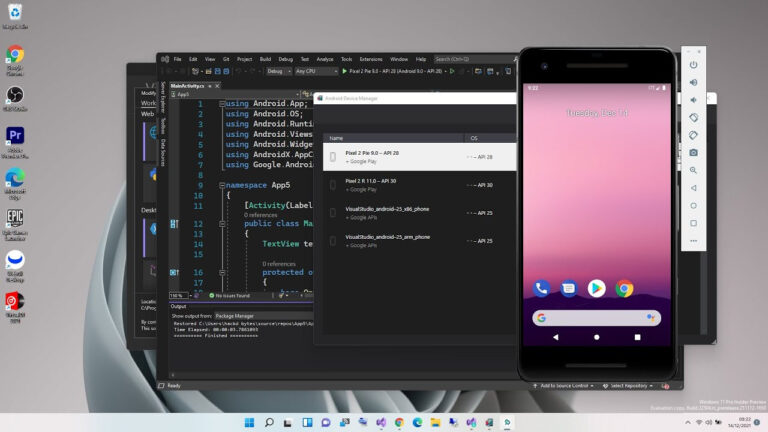
When launched, the emulator displays an initial splash screen during the loading process. Once loaded, the
main emulator window appears containing a representation of the chosen device type
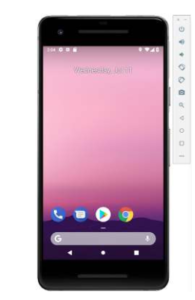
Positioned along the right-hand edge of the window is the toolbar providing quick access to the emulator controls and configuration options.
The Emulator Toolbar Options
The emulator toolbar provides access to a range of options relating to the appearance and behavior
of the emulator environment.
Using and Configuring the Android Studio AVD Emulator
Each button in the toolbar has associated with it a keyboard accelerator which can be identified either by
hovering the mouse pointer over the button and waiting for the tooltip to appear, or via the help option of the
extended controls panel.
Though many of the options contained within the toolbar are self-explanatory, each option will be covered for
the sake of completeness:
• Exit / Minimize – The uppermost ‘x’ button in the toolbar exits the emulator session when selected while the
‘-’ option minimizes the entire window.
• Power – The Power button simulates the hardware power button on a physical Android device. Clicking and
releasing this button will lock the device and turn off the screen. Clicking and holding this button will initiate
the device “Power off ” request sequence.
• Volume Up / Down – Two buttons that control the audio volume of playback within the simulator environment.
• Rotate Left/Right – Rotates the emulated device between portrait and landscape orientations.
• Take Screenshot – Takes a screenshot of the content currently displayed on the device screen. The captured
image is stored at the location specified in the Settings screen of the extended controls panel as outlined later
in this chapter.
• Zoom Mode – This button toggles in and out of zoom mode, details of which will be covered later in this
chapter.
• Back – Simulates selection of the standard Android “Back” button. As with the Home and Overview buttons
outlined below, the same results can be achieved by selecting the actual buttons on the emulator screen.
• Home – Simulates selection of the standard Android “Home” button.
• Overview – Simulates selection of the standard Android “Overview” button which displays the currently
running apps on the device.
• Fold Device – Simulates the folding and unfolding of a foldable device. This option is only available if the
emulator is running a foldable device system image.
• Extended Controls – Displays the extended controls panel, allowing for the configuration of options such as
simulated location and telephony activity, battery strength, cellular network type and fingerprint identification.
Working in Zoom Mode
The zoom button located in the emulator toolbar switches in and out of zoom mode. When zoom mode is active
the toolbar button is depressed and the mouse pointer appears as a magnifying glass when hovering over the
device screen. Clicking the left mouse button will cause the display to zoom in relative to the selected point
on the screen, with repeated clicking increasing the zoom level. Conversely, clicking the right mouse button
decreases the zoom level. Toggling the zoom button off reverts the display to the default size.
Clicking and dragging while in zoom mode will define a rectangular area into which the view will zoom when
the mouse button is released.
While in zoom mode the visible area of the screen may be panned using the horizontal and vertical scrollbars
located within the emulator window.
Resizing the Emulator Window
The size of the emulator window (and the corresponding representation of the device) can be changed at any
time by clicking and dragging on any of the corners or sides of the window
Location
The location controls allow simulated location information to be sent to the emulator in the form of decimal or
sexigesimal coordinates. Location information can take the form of a single location, or a sequence of points
representing movement of the device, the latter being provided via a file in either GPS Exchange (GPX) or
Keyhole Markup Language (KML) format. Alternatively, the integrated Google Maps panel may be used to
visually select single points or travel routes.
Displays
In addition to the main display shown within the emulator screen, the Displays option allows additional displays
to be added running within the same Android instance. This can be useful for testing apps for dual screen
Using and Configuring the Android Studio AVD Emulator
devices such as the Microsoft Surface Duo. These additional screens can be configured to be any required size
and appear within the same emulator window as the main screen
Extended Control Options
The extended controls toolbar button displays the panel illustrated in Figure 5-3. By default, the location settings
will be displayed. Selecting a different category from the left-hand panel will display the corresponding group
of controls:
Cellular
The type of cellular connection being simulated can be changed within the cellular settings screen. Options are
available to simulate different network types (CSM, EDGE, HSDPA etc) in addition to a range of voice and data
scenarios such as roaming and denied access.
Camera
The emulator simulates a 3D scene when the camera is active. This takes the form of the interior of a virtual
building through which you can navigate by holding down the Option key (Alt on Windows) while using the
mouse pointer and keyboard keys when recording video or before taking a photo within the emulator. This
extended configuration option allows different images to be uploaded for display within the virtual environment.
Battery
A variety of battery state and charging conditions can be simulated on this panel of the extended controls screen,
including battery charge level, battery health and whether the AC charger is currently connected.
Phone
The phone extended controls provide two very simple but useful simulations within the emulator. The first
option allows for the simulation of an incoming call from a designated phone number. This can be of particular
use when testing the way in which an app handles high level interrupts of this nature.
The second option allows the receipt of text messages to be simulated within the emulator session. As in the real
world, these messages appear within the Message app and trigger the standard notifications within the emulator