Unveiling Wireless Attacks: A Deep Dive into Wi-Fi Security Breaches
Wireless networks have revolutionized how we stay connected, but they’ve also introduced vulnerabilities ripe for exploitation. In this blog, we’ll explore the fascinating and slightly nerve-wracking world of Wi-Fi attacks, focusing on methods that involve setting up fake access points to mimic legitimate networks. These attacks can manipulate unsuspecting users into sharing sensitive information without realizing it.
Whether you’re a cybersecurity enthusiast or just curious about how hackers exploit networks, this post will walk you through the basics of setting up your machine for Wi-Fi hacking, performing attacks, and even using tools like Metasploit to capture and manipulate network traffic.
The Foundation of Wi-Fi Attacks: Fake Access Points
Most Wi-Fi attacks revolve around creating a fake access point (AP)—a rogue router that pretends to be part of a legitimate network. Once connected, unsuspecting users can have their traffic monitored, manipulated, or even redirected. One popular attack, the Evil Twin, allows attackers to capture passwords, intercept sensitive data, and even inject malicious payloads into a victim’s system—all while sitting inconspicuously nearby.
The key steps in this process include:
- Configuring your machine to work with Wi-Fi hacking tools.
- Using tools available in Kali Linux to perform basic attacks.
- Leveraging Metasploit to intercept and manipulate network traffic.
Setting Up for Wi-Fi Hacking
Before jumping into action, you’ll need the right hardware: a wireless adapter. Your adapter must support two critical features:
- Monitor Mode: Allows the adapter to listen to all wireless traffic in the area.
- Packet Injection: Enables the adapter to send fake packets to other devices.
Choosing the Right Wireless Adapter
One reliable brand for Wi-Fi adapters is Alfa Network, which offers several models compatible with Kali Linux. You can find a list of compatible adapters here. If you’re running Kali Linux on a virtual machine, make sure to use a USB Wi-Fi adapter and connect it to your virtual machine through the system settings.
Installing Drivers for Your Adapter
Once you’ve selected your adapter, you’ll need to install its drivers. Many adapters include detailed installation instructions, but some installations are straightforward. For example, to set up the Alfa AWUS 1900 Wi-Fi adapter, you’d run:
sudo apt install realtek-rtl8814au-dkms
Verifying the Installation
To ensure your adapter is properly installed, use the iwconfig command:
iwconfig
A successful setup will show details like this:
wlan0     unassociated  Nickname:"WIFI@RTL8814AU"
          Mode:Monitor  Frequency=2.432 GHz
Key points to verify:
- Your adapter’s nickname (e.g.,
WIFI@RTL8814AU) is associated with the interface (e.g.,wlan0). - The mode is set to Monitor, allowing you to capture wireless traffic.
Troubleshooting: Adapter Not in Monitor Mode?
If your adapter isn’t in Monitor Mode, don’t worry. The next step involves switching modes and ensuring your setup is ready for advanced attacks. Stay tuned for the upcoming blog post where we’ll dive deeper into changing modes, sniffing traffic, and launching various attacks.
Final Thoughts
Understanding wireless attacks isn’t just about becoming a skilled hacker—it’s about recognizing vulnerabilities and learning how to secure your network. Tools like Kali Linux and Metasploit are powerful, but they require careful handling and a strong ethical foundation. Whether you’re learning for professional growth or personal interest, always prioritize responsible use of this knowledge.
Stay safe, stay ethical, and keep learning! In the next post, we’ll dive into advanced attack techniques and discuss how to protect yourself against them.
If you enjoyed this post or have questions, let me know in the comments!
Monitoring Wi-Fi Traffic: A Beginner’s Guide to Network Security
Setting Your Adapter to Monitor Mode
To begin, you’ll need to put your wireless adapter into monitor mode, allowing it to capture all wireless traffic in its range. This includes packets not necessarily meant for your device. Here’s how:
sudo airmon-ng start wlan0
Once in monitor mode, your adapter will be able to capture packets and detect wireless activity. Next, use airodump-ng to display nearby access points and their connected devices:
sudo airodump-ng wlan0 -band a
The -band a option is essential for monitoring 5 GHz networks. By default, airodump-ng focuses on 2.4 GHz Wi-Fi.
Interpreting the Output
The airodump-ng output provides two key tables:
- Access Points (APs):
- BSSID: The unique MAC address identifying each access point.
- ESSID: The network name, like “HomeWiFi” or “xfinitywifi.”
- ENC, CIPHER, and AUTH: Details about the network’s security:
- ENC: Encryption type (e.g., WPA2 or open).
- CIPHER: The encryption cipher used (e.g., CCMP).
- AUTH: Authentication type (e.g., PSK for pre-shared key).
- Connected Devices (Clients):
- STATION: The MAC addresses of devices connected to the APs.
- Probing Clients: Devices looking for previously connected networks, often prime targets for attacks.
Deauth Attacks: Disconnecting Wi-Fi Clients
A deauthentication attack forces a Wi-Fi client to disconnect from a network. This attack works by sending forged deauthentication frames, tricking the client into thinking it’s been disconnected by the access point.
Using Aireplay-ng
Here’s how to perform a deauth attack with aireplay-ng:
sudo aireplay-ng -0 40 -a 00:25:00:FF:94:73 -c AA:09:C9:8C:BA:04 wlan0
-0: Specifies a deauth attack.40: Number of packets to send.-a: MAC address of the access point.-c: Target client’s MAC address.
This command will send 40 deauthentication frames, effectively kicking the client off the network.
Defending Against Deauth Attacks
Modern access points can implement Protected Management Frames (PMFs) to prevent deauth attacks. PMFs validate management frames, ensuring that only legitimate ones are accepted.
Advanced Attacks with MDK4
For more advanced deauth and DoS attacks, the mdk4 tool offers versatile options. To install it, run:
sudo apt install mdk4
Performing a DoS Attack
A DoS attack prevents clients from accessing the network by flooding the access point with fake requests. Here’s an example using MDK4:
sudo mdk4 wlan0 e -t 00:25:00:FF:94:73 -s 100
e: EAPOL-based attack mode.-t: Target BSSID.-s: Speed in packets per second (e.g., 100).
This command bombards the access point with EAPOL Start frames, overloading it and disrupting legitimate connections.
Capturing and Cracking WPA2 Handshakes: A Step-by-Step Guide
Wi-Fi security relies heavily on encryption to protect networks from unauthorized access. But even the robust WPA2 protocol has vulnerabilities that can be exploited by capturing and cracking the four-way handshake—the initial authentication process between a client and an access point. This blog will guide you through the process, including capturing the handshake, performing a dictionary attack, and using advanced tools like Hashcat for password recovery.
Understanding the WPA2 Four-Way Handshake
When a client connects to a WPA2-enabled network, it must prove it knows the pre-shared key (PSK) or Wi-Fi password. To avoid sending this password in plaintext, the client and access point exchange a series of encrypted messages called the WPA2 four-way handshake. Capturing this handshake is the first step toward attempting to crack the network’s password.
Step 1: Capturing the WPA2 Handshake
Preparing Airodump-ng
To capture a handshake, use the airodump-ng tool:
sudo airodump-ng -c <channel> -bssid <AP_BSSID> -w <output_file> wlan0
-c: Specifies the channel of the target access point.-bssid: The BSSID (MAC address) of the access point.-w: The file where captured handshakes will be saved.
For example:
sudo airodump-ng -c 149 -bssid FA:3A:E7:4F:C8:1C -w handshake wlan0
Waiting for a Handshake
Airodump-ng passively listens for handshake exchanges. Once it captures a handshake, you’ll see a message like:
[ WPA handshake: FA:3A:E7:4F:C8:1C ]
This indicates a successful capture. However, it may take time for a client to connect to the network naturally.
Step 2: Speeding Things Up with Deauthentication Attacks
To force a client to reconnect and initiate the handshake, use a deauth attack:
sudo aireplay-ng -0 50 -a <AP_BSSID> wlan0
-0: Initiates a deauth attack.50: Number of deauth packets to send.-a: BSSID of the access point.
For more precision, target a specific client:
sudo aireplay-ng -0 50 -a <AP_BSSID> -c <CLIENT_MAC> wlan0
This attack disconnects the client, forcing it to reconnect and complete the handshake.
Step 3: Cracking the Handshake
Once you’ve captured the handshake, you can attempt to crack the Wi-Fi password using aircrack-ng. A dictionary file containing potential passwords is essential for this step.
Using Aircrack-ng with a Dictionary
Run the following command:
aircrack-ng -w /path/to/wordlist -b <AP_BSSID> <handshake_file>.cap
-w: Path to the dictionary file.-b: BSSID of the access point.<handshake_file>.cap: The file containing the captured handshake.
For example:
aircrack-ng -w /usr/share/wordlists/wifite.txt -b FA:3A:E7:4F:C8:1C handshake-01.cap
Aircrack-ng will compare each password in the dictionary against the handshake, reporting success if it finds a match.
Limitations of Dictionary Attacks
A dictionary attack is only as effective as the quality of the wordlist. If the network’s password isn’t in the list, the attack will fail. In such cases, brute-forcing the password using tools like Hashcat may be necessary.
Step 4: Advanced Cracking with Hashcat
Hashcat is a GPU-accelerated tool capable of brute-forcing passwords. To use Hashcat, you need to convert the captured handshake into a compatible format (e.g., .hccapx). You can use online converters like cap2hccapx or tools such as hashcat-utils for this.
Once converted, run Hashcat:
hashcat -m 2500 -a 3 handshake.hccapx ?d?d?d?d?d?d?d?d
-m 2500: Specifies WPA/WPA2 hash mode.-a 3: Brute-force mode.?d?d?d?d?d?d?d?d: Indicates an 8-digit numeric password.
Hashcat is incredibly powerful and can test millions of passwords per second, but it requires significant computing power.
Evil Twin Attacks: Exploiting Wi-Fi Vulnerabilities with Rogue Access Points
An Evil Twin attack is a crafty method of exploiting Wi-Fi networks by mimicking a legitimate access point (AP) and luring unsuspecting users to connect to it. This attack capitalizes on user behavior and technical vulnerabilities to intercept traffic, steal credentials, or even inject malicious payloads. In this blog, we’ll delve into how to set up and execute an Evil Twin attack using tools like Airgeddon and Metasploit, along with tips for enhancing stealth and effectiveness.
How Evil Twin Attacks Work
The Evil Twin attack is closely related to the Karma attack, where hackers broadcast fake beacon frames to impersonate a legitimate AP. These frames include the same ESSID and BSSID as the original network, making it nearly indistinguishable to users.
Attackers often use a deauthentication attack to force clients off the legitimate AP, prompting them to reconnect—sometimes inadvertently joining the rogue Evil Twin.
Limitations of the Attack
- Open vs. Secured Networks: Evil Twin networks are often open (without encryption), which can raise suspicion if users expect the original network to be secured.
- Detection Risks: To reduce suspicion, attackers often clone open networks from public places like airports, cafes, or hotels.
Setting Up an Evil Twin Attack with Airgeddon
Step 1: Installing Airgeddon
Airgeddon simplifies the process of creating Evil Twin networks and supports multiple attack variations. To install it, run:
sudo apt install airgeddon -y
Step 2: Launching Airgeddon
Start Airgeddon:
sudo airgeddon
Airgeddon will verify the availability of required tools (e.g., airmon-ng, xterm). If any tools are missing, follow the on-screen instructions to install them.
Step 3: Selecting an Interface
Choose the network interface (e.g., wlan0) you’ll use to transmit and receive packets. Ensure the interface supports monitor mode.
Launching the Evil Twin Attack
- Put your interface in monitor mode through Airgeddon’s main menu.
- Scan for potential targets to clone.
- Select the Evil Twin attack option:
- Option 5: Creates a rogue AP without sniffing or modifying traffic.
- Option 6: Captures traffic but does not modify it.
- Option 8: Captures traffic, injects malicious payloads, and modifies packets using tools like BeEF.
Cloning the Target Network
Airgeddon will populate the BSSID, channel, and ESSID of the selected target. Use this data to clone the legitimate network. For example:
- BSSID: FA:3A:E7:4F:C8:1C
- Channel: 149
- ESSID: xfinitywifi
You can optionally skip the target discovery phase and manually enter details for your custom Evil Twin network.
Avoid Detection
When prompted, disable channel hopping unless your Wi-Fi card explicitly supports it. Channel hopping can make your attack more noticeable to monitoring tools.
Sniffing Traffic with Metasploit
After setting up your Evil Twin AP, use Metasploit to sniff and analyze traffic. Here’s how:
- Launch the psnuffle module:
msf > use auxiliary/sniffer/psnuffle - Configure options:
- INTERFACE: The interface handling traffic (e.g., wlan0).
- FILTER: Optional string to filter specific traffic types.
- SNAPLEN: Number of bytes to capture per packet (default: 65535).
msf auxiliary(sniffer/psnuffle) > set INTERFACE wlan0 msf auxiliary(sniffer/psnuffle) > run - View captured traffic: The module will parse traffic for various protocols, including HTTP, FTP, IMAP, POP3, and SMB.
Enhancing the Attack with Payload Injection
Airgeddon supports advanced Evil Twin configurations that include traffic modification and payload injection. For instance, you can integrate the BeEF exploitation framework to deliver malicious JavaScript payloads:
- Option 8: Evil Twin with traffic sniffing and payload injection.
This enables the attacker to manipulate user traffic or deliver exploits directly to connected devices.
Example: Capturing Sensitive Data
Here’s a simple scenario:
- A client connects to your Evil Twin AP.
- You use Metasploit’s psnuffle module to capture unencrypted HTTP GET requests.
- Data like URLs, cookies, or authentication tokens may be exposed.
Example output:
[*] HTTP GET: 192.168.0.220:60127 -> 74.208.215.183:80 /login<br>The Evil Twin attack is a powerful method for intercepting network traffic, stealing credentials, and delivering exploits. Tools like Airgeddon and Metasploit streamline the attack process, making it accessible even to beginners in penetration testing.
In the next blog post, we’ll cover how to create a malicious landing page to prompt users into downloading payloads, such as a Meterpreter shell, for complete system compromise.
Got questions or suggestions for future topics? Let us know in the comments!
If you’re eager to dive deeper into advanced topics like software-defined radio or GSM, GPRS, SS7, and EDGE, I highly recommend these Udemy courses:
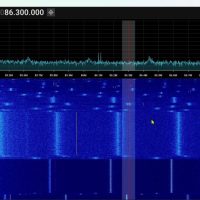
- Mastering Software-Defined Radio
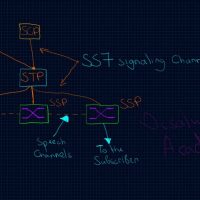
Learn how to use SDR tools and techniques for wireless analysis, frequency scanning, and more. - GSM, GPRS, SS7 & EDGE Masterclass
Explore the technical details of mobile communication protocols and learn how to test and secure networks effectively.
These courses are packed with insights, practical examples, and real-world applications that complement the topics discussed in this blog. After completing them, revisit this blog for a hands-on perspective on Evil Twin Wi-Fi attacks and their relation to network vulnerabilities.






Comments are closed.